Install Scripts-Linux
These install scripts will dramatically reduce the time and effort necessary for installing OpenCATS on a Linux system. HOWEVER, there are some very specific requirements that must be met for using these scripts. If you don’t meet these requirements, there is no telling what can happen to any web-software that you are running from the system you use this script on.
Warning
These scripts are ONLY for Linux systems that do not have Apache, MySQL/MariaDB and PHP installed. This will install a full lamp stack from scratch. It will likely wipe out any existing settings that are in place. I can not stress this enough.
This script is updated for OpenCATS-0.9.4-3.
Having gotten that out of the way, let’s proceed.
Open a terminal
Note
If you get a wget error, install wget. sudo apt-get install wget in Ubuntu and Debian, sudo yum install wget in CentOS.
Get the correct script for your distribution
Wget the install script for your Distro by typing/copy-paste the following into your terminal.
Ubuntu 16.04:
$ wget https://raw.githubusercontent.com/opencats/OpenCATS-Installation-Scripts/master/Ubuntu16.04-OpenCATS-Install.sh
Ubuntu 18.04:
$ wget https://raw.githubusercontent.com/opencats/OpenCATS-Installation-Scripts/master/Ubuntu18.04-OpenCATS-Install.sh
List directory to see the file name:
ls
Make the script executable:
sudo chmod +x script-name.sh
Run the script:
sudo ./script-name.sh
Wait until it is finished.
Install the OpenCATS software
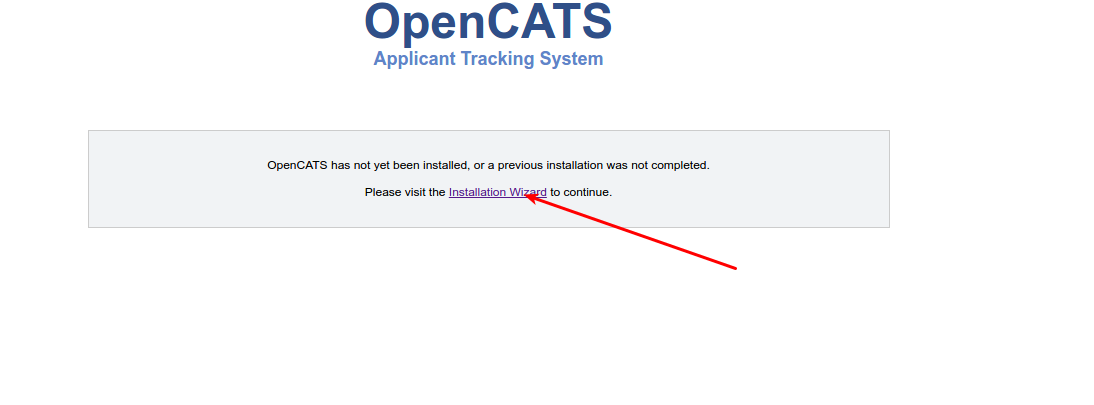
In your browser, go to http://localhost/opencats
Click: Installation Wizard
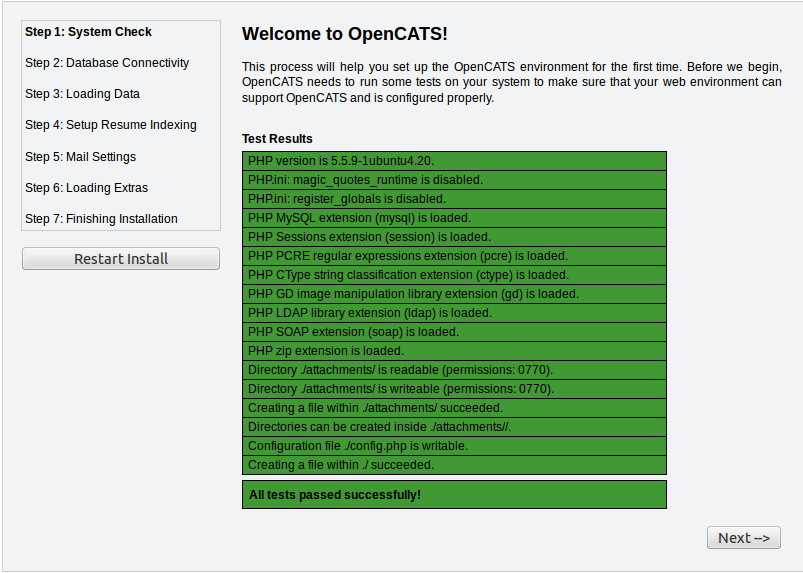
Step 1: System Connectivity
This step makes sure you have the required server environment set up correctly.
Note
Green = good.
Note
Yellow = OpenCATS will work, but some functions may not.
Warning
Red = Bad You can’t continue the installation until a server environment issue is fixed.
If there are no issues, it should be all green, click Next
Step 2: Database connectivity
Do NOT change anything here. Use the default information.
Click Test Database Connectivity
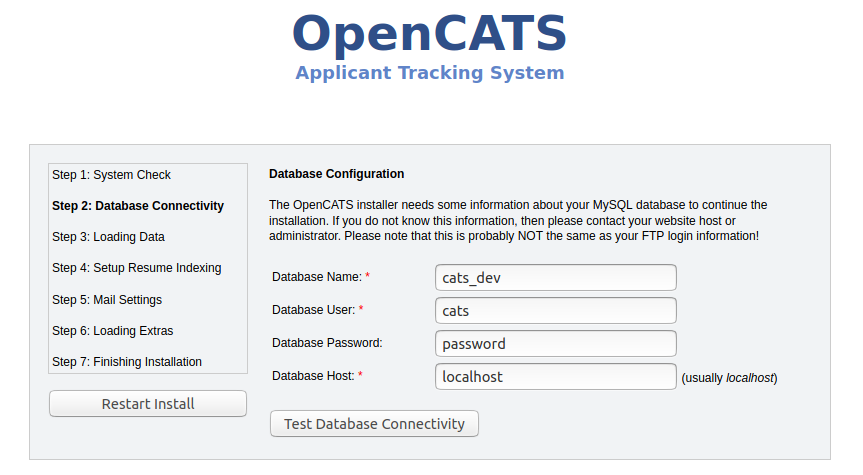
If you see all green, click next
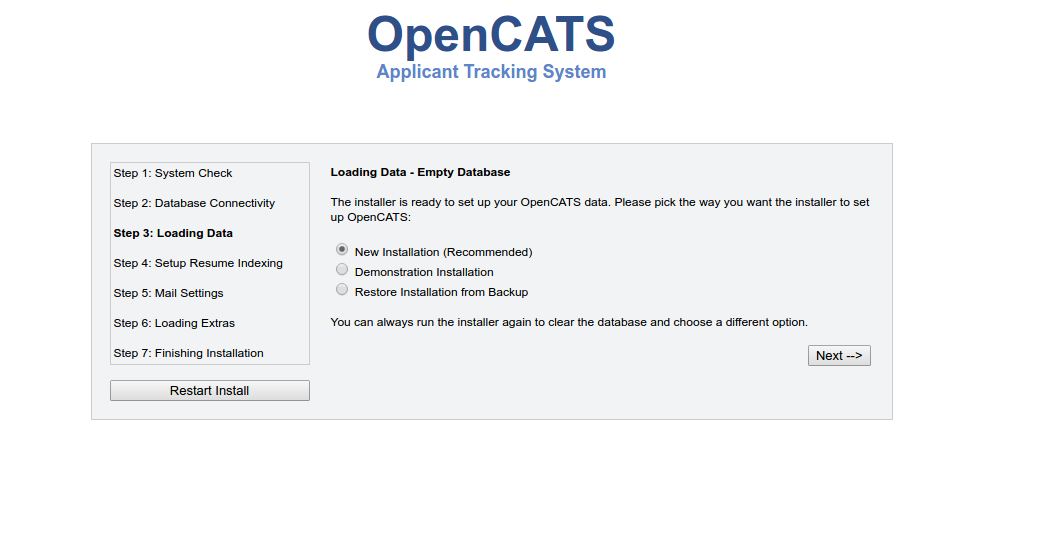
Step 3: Loading Data
For a new installation, select New Installation, then next
Note
Demonstration Installation will autopopulate OpenCATS with general example clients, candidates, job orders, etc. There’s no reason to use this in my opinion.
Note
Restore installation from backup will be covered in a future tutorial
Step 4 Setup resume indexing
- Change the paths to the executables to the correct paths. They should be as follows:
- /usr/bin/antiword
- /usr/bin/pdftotext
- /usr/bin/html2text
- /usr/bin/unrtf
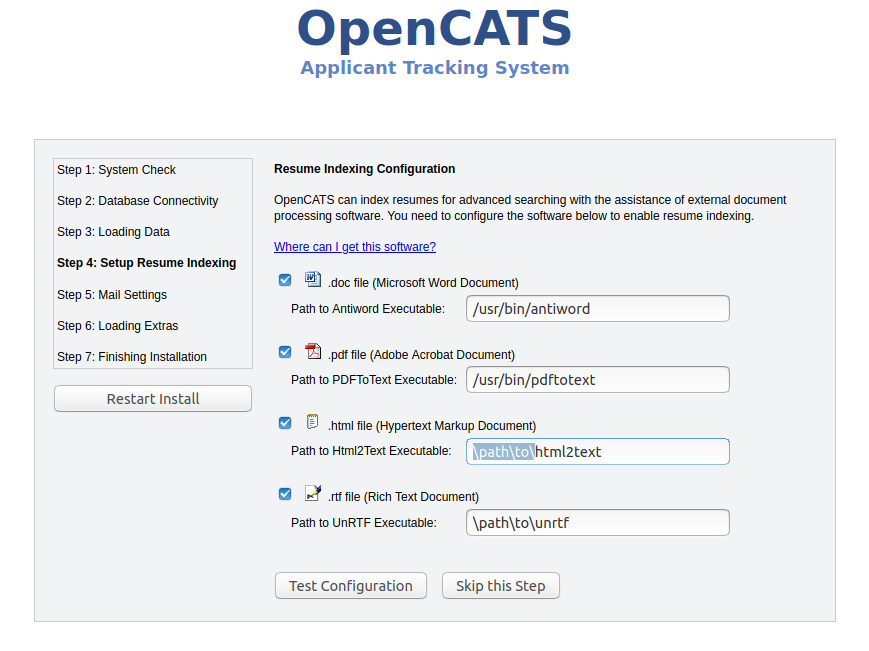
- Click
Test Configuration
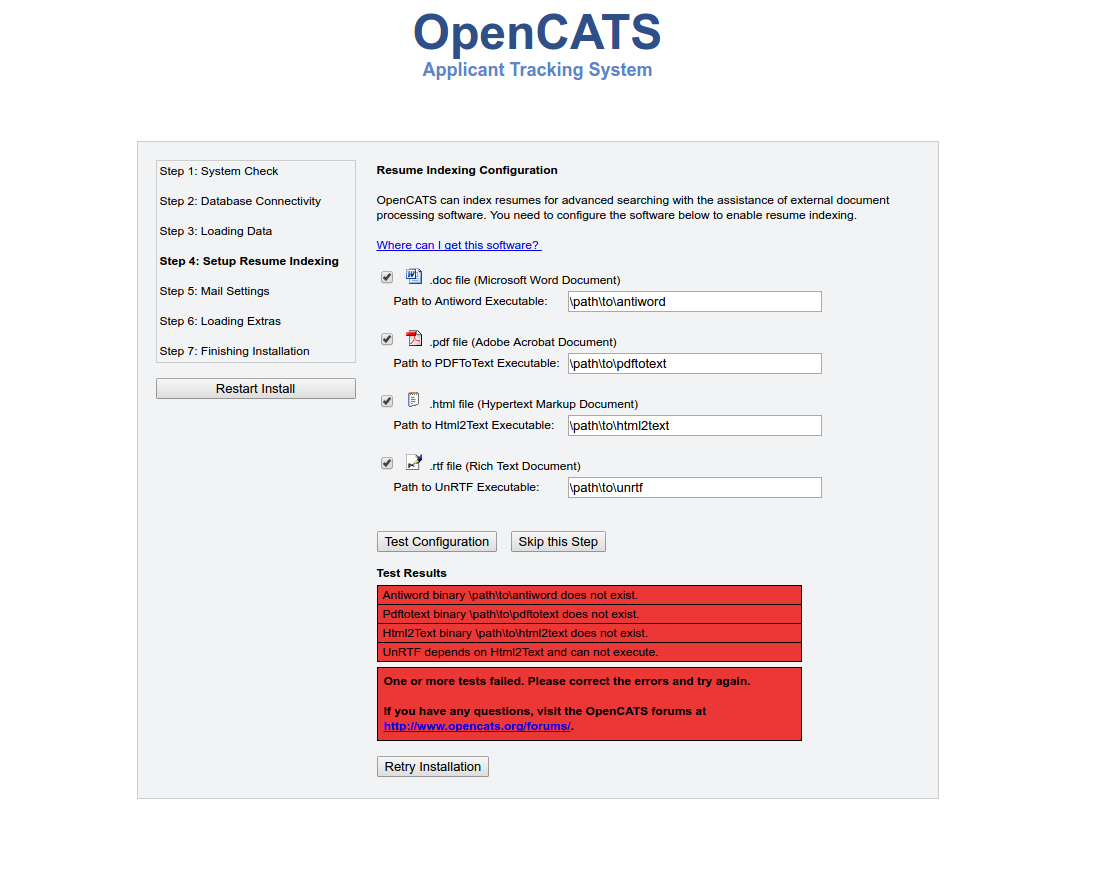
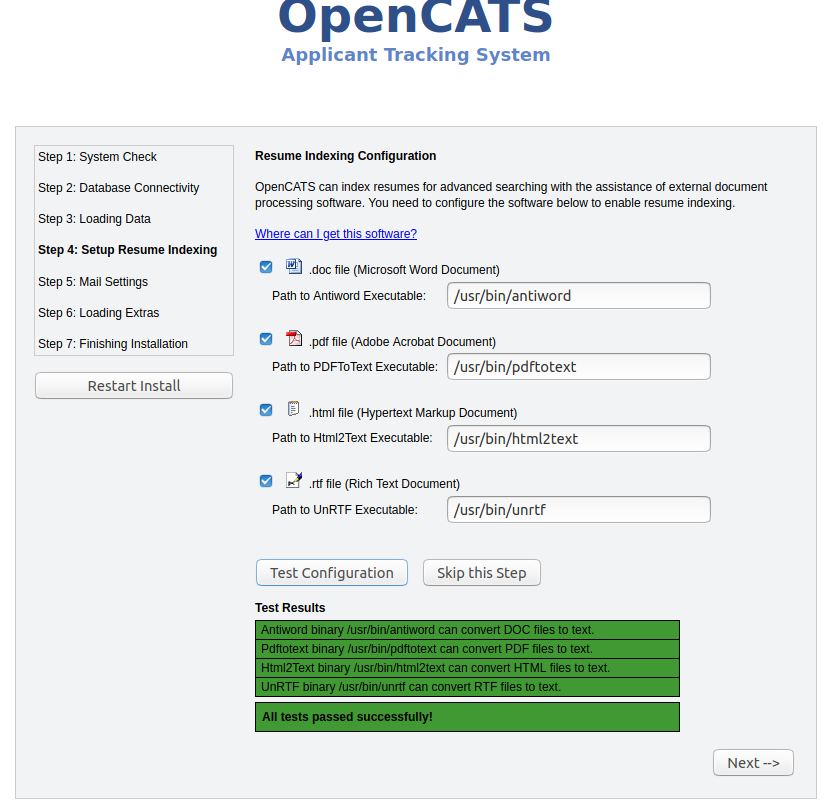
Note
I always get red the first couple clicks, then it will go green. If you get green, proceed. If it stays red after a few click, the system isn’t recognizing the executables. There may be a path issue that needs corrected.
- Click, Click, click, it will turn green.
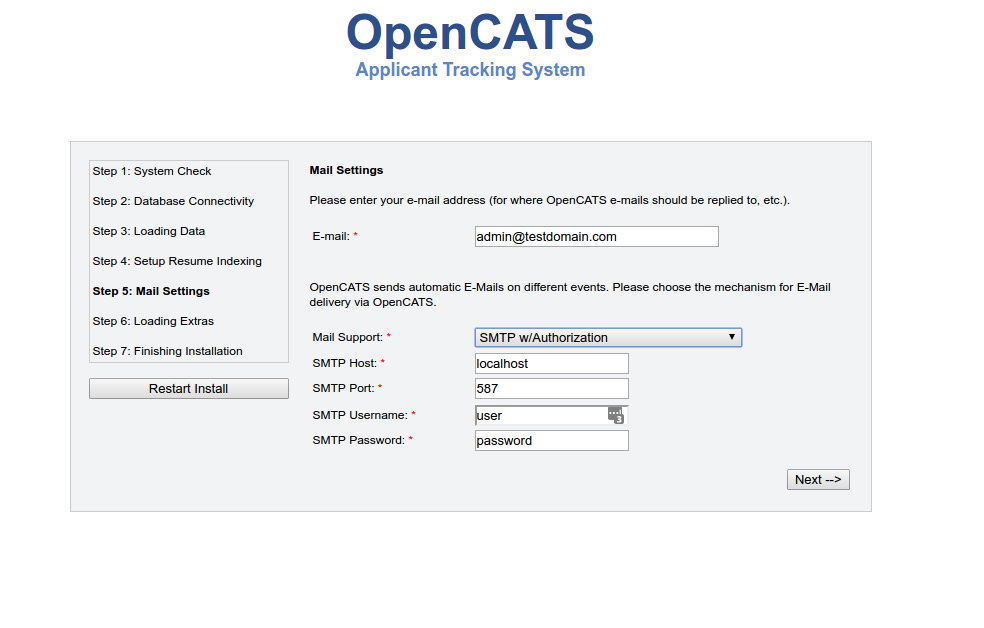
Step 5 Mail Settings
OpenCATS can send emails. If you don’t want to use it, you don’t have to. OpenCATS works great either way!
Choose an option from the Mail Support drop-down bar, fill the necessary information in (if you are using it) and click Next
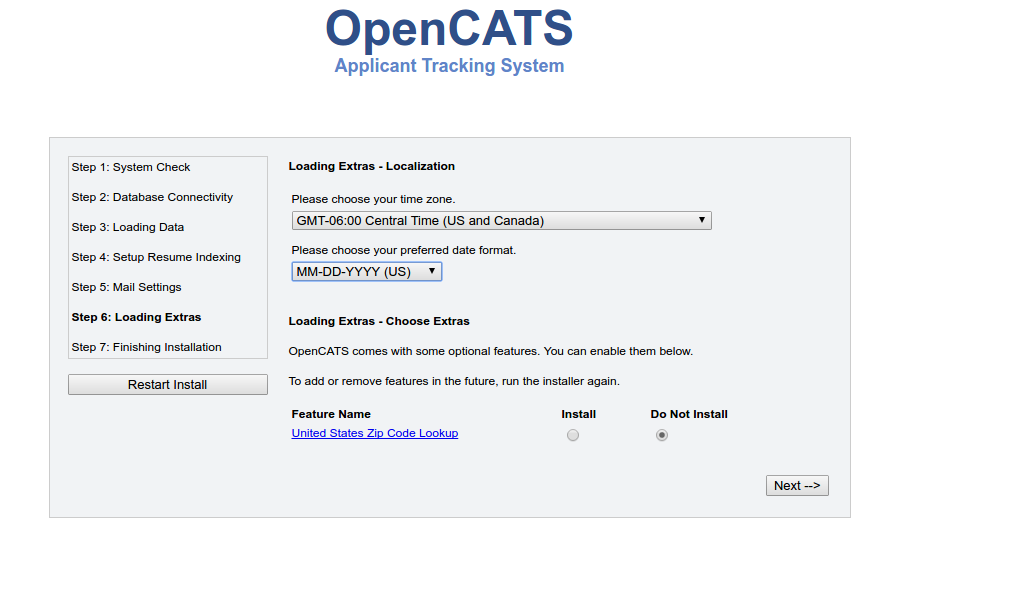
Step 6 Loading extras
Don’t forget to set the time zone to your area!
Warning
If you forget to set the time zone ALL of the timestamps on every note in OpenCATS will be wrong. Set the time zone correctly. You will thank us…
Choose the date format you like best
(United States only) choose to install (if you want) zip code lookup
Click next
Step 7 Finishing installation
Runs through the installation process. You should see a box and some pretty bars moving. It shouldn’t take long.
Note
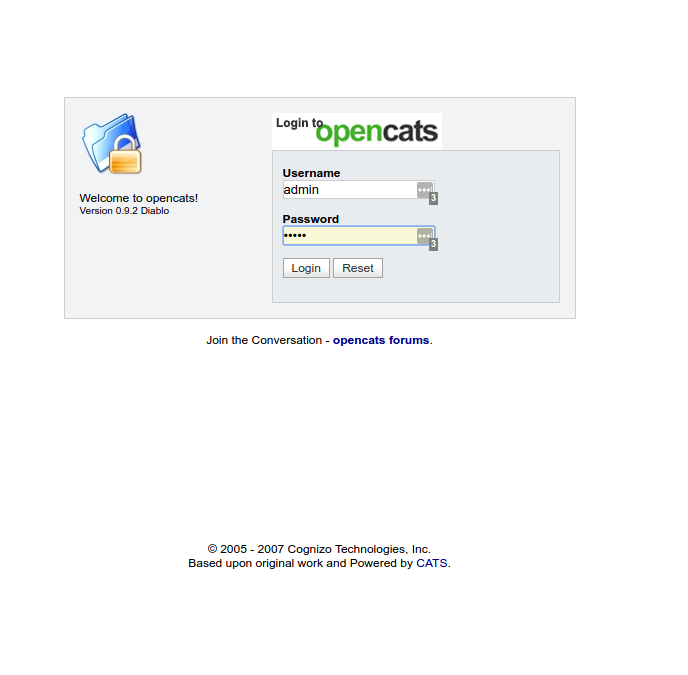
The default username and password are: admin/admin (all lowercase)
Click Start OpenCATS for your login screen.
Success!!
Your brand new OpenCATS applicant System!
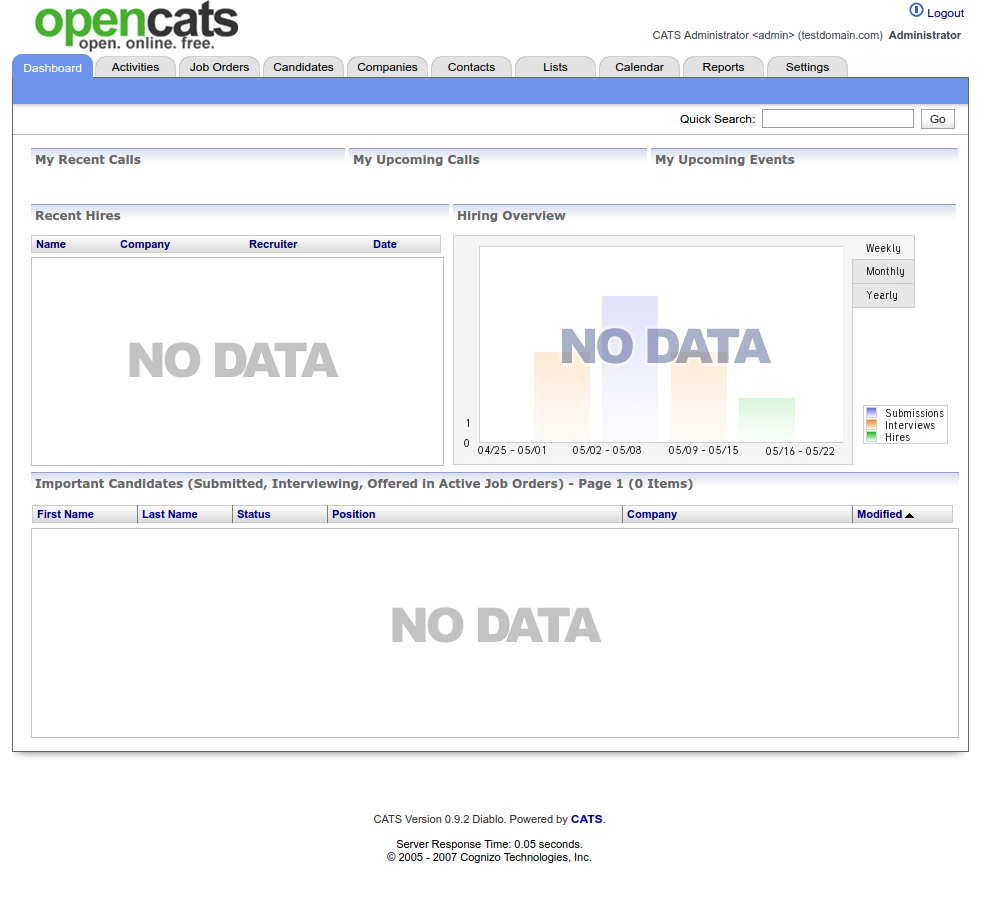
Warning
Immediately change your admin password!
- Click
Settings - Click
Administration - Click
User Management - Click
your name - Click
edit - Click
reset password - Type your new password
- Click
save